Ingredients:
4 Medium Mirlitons
2 T crab boil (liquid)
4 T margarine
1 cup green onion, chopped
1 large onion, finely chopped
1/2 cup parsley, chopped
1 pound shrimp, peeled and deveined
garlic powder (or minced garlic) to taste
salt and pepper to taste
1/2 cup bread crumbs
Boil mirlitons until tender in salty water to which 2 tbsps of crab
boil were added.
Peel and cube the pulp. Sauté green onions,
onions and parsley in margarine. Add shrimp and cook 10 minutes.
Add mirliton, garlic salt, salt and pepper to taste and mix well.
Pour into 9x13-inch casserole, sprinkle with bread crumbs and bake
30 minutes.

Wednesday, November 24, 2010
Mississippi Mud
Ingredients:
1 cup chopped Walnuts
1/2 cup All-Purpose Flour
1/2 cup butter, softened
2 (3.9 oz) packages instant chocolate pudding mix
2 cups cold milk
1 (8 oz) package cream cheese, softened
1 cup confectioner's sugar
1/2 cup heavy whipping cream
vanilla to taste (optional)
Kitchenware:
Medium Mixing Bowls
Large Mixing Bowl
9x13 Pan
Whisk
Stirring Utensil
Measuring Cups/Spoons
Preheat oven to 350. In a medium mixing bowl, combine walnuts and flour. Mix well, then stir in softened butter or margarine. Stir until ingredients are combined and mixture forms a ball. Press into bottom of a 9x13 inch pan. Bake in preheated oven for 20 minutes, until golden brown. Remove and cool.
In another medium bowl, place pudding mix, and slowly whisk in milk. Mix until smooth; allowing to set up for 5 minutes then spread on top of cooled crust.
In a large bowl, whip cream cheese until fluffy.Beat in confectioner's sugar until mixture is smooth. Add in vanilla if you wish. In a separate bowl, whip cream until soft peaks form, then fold into cream cheese mixture. Spread over pudding layer. Chill before serving.
Coconut Pancakes
Someone on my birth board just shared this recipe, and my mouth is watering... What can't you do with pancakes?!?!
Ingredients
- 1 1/2 cups all-purpose flour (about 6 3/4 ounces)
- 2 tablespoons sugar
- 2 tablespoons flaked sweetened coconut
- 1 teaspoon baking powder
- 1/2 teaspoon salt
- 1 (13.5-ounce) can light coconut milk
- 1 tablespoon butter, melted
- 1 large egg, lightly beaten
Preparation
Lightly spoon flour into dry measuring cups; level with a knife. Combine flour and next 4 ingredients (through salt) in a large bowl. Combine coconut milk, butter, and egg; stir well. Add coconut milk mixture to flour mixture, stirring until smooth.Pour about 1/4 cup batter per pancake onto a hot nonstick griddle or nonstick skillet. Cook 3 minutes or until tops are covered with bubbles and edges look cooked. Carefully turn pancakes over; cook 2 minutes or until bottoms are lightly browned.
Tuesday, November 23, 2010
French Bread
2 ¼ c. warm water
2 T. sugar
1 Tbsp yeast
1 Tbsp salt
2 Tbsp oil
5 ½ -6 cups flour-stirred before measured
Dissolve sugar and yeast in the warm water. Let this proof—or sit for a few minutes until it bubbles. Then add salt, oil and 3 cups of flour and beat well. Add in 2 1/2 -3 more cups of flour. The dough should clean off the sides of the bowl and not be too stick – but be careful not to add too much flour. Knead for a few minutes.
Leave the dough in the mixer to rest for 10 minutes and then stir it down (turn on your mixer for 10 seconds) and then allow to rest another 10 minutes. Repeat for a total of 5 times.
Then turn dough onto a floured surface and divide into two equal parts. Roll each part into a 9×13 rectangle. Roll dough up, starting from long edge of loaf to seal. Arrange seam side down on large baking sheet that’s been sprinkled with corn meal, allowing room for both loaves. Repeat with second part of dough. With a sharp knife, cut 3 gashes at an angle on the top of each. Cover lightly; allow to rise 30 minutes. Brush entire surface with egg wash (one egg beaten slightly with 1 Tbsp of water). If desired, sprinkle with sesame seeds. Bake for 30 minutes at 375 degrees.
Wednesday, November 17, 2010
Chicken and Chile Enchiladas
I am SO not a Mexican food lover. I am extremely picky about Mexican food, and since most of it is blegh, I tend to stay away from it. However, when I went to Kentwood to visit family before Marie was born, they introduced me to this recipe...
These are unlike any enchiladas I have ever had! They are silky and creamy in the middle, and have just enough sauce and cheese on them to not be overpowering. Even if you don't like Mexican food, I'm sure this will be a hit at home!
Ingredients:
1 pound chicken breast or thighs (cubed or cut into strips)
1- 8 oz package cream cheese, cubed
1- 4.5 oz can Chopped Green Chiles ( I use the 7 oz can, because we like the added spice)
1 package 6 inch tortillas
2- 10 oz cans Green Chile Enchilada Sauce (Mild or Hot depending on spice preference)
3/4 cup shredded Cheddar Cheese
*For additional spice, you could also add chopped jalepeno
Kitchenware:
13x9 baking dish (or two smaller pans... one pan to cook, and one to freeze)
10 inch skillet
Stirring Utensil
This is a quick and easy dinner! I always have the ingredients on hand, the chiles and sauce in the pantry, chicken, cream cheese and tortillas in the freezer (Yes, you CAN freeze them!), and cheddar in the fridge.
Heat oven to 400 degrees; spray your baking dish with cooking spray. In your skillet, cook chicken over Medium-High heat, stirring occasionally, until no longer pink in the center. Stir in cream cheese and chiles; reduce heat to Medium. Cook and stir until blended and cream cheese is melted.
Spoon chicken filling into tortillas; roll up and place seam sides down in baking dish. Pour enchilada sauce over top; sprinkle with cheese. Bake 15-20 minutes, until cheese is melted.
If you were freezing a batch, you would still put the sauce and cheese on top. Then wrap with saran wrap, and aluminum foil. I like to write the heating directions on the foil so I remember. 400 for 30 minutes.This freezes wonderfully and tastes just as spectacular as if you had made it fresh!
Shutterfly Cards
As the search for Holiday Cards is drawing near, I thought I'd share a little something! Shutterfly has some BEAUTIFUL cards. I mean, cards that I would never even think of, this site has them. I do think we are going to have a problem choosing between cards. How do you choose cards? They also have some neat gifts ideas, calendars, photo books, and many other photo gifts. I think my favorite card at the moment is this one.

We've used Shutterfly since before Marie was born, sharing sonogram pictures with family, recent pictures and updates about her, and we ordered her Announcements from Shutterfly. They came with envelopes and were breathtakingly beautiful. Not to mention, they always have coupon codes for free shipping, discounts, and free photos if you sign up for their newsletter. We've used other sites before for photo printing, but the discount prices also came with discount quality. I would much rather pay a little extra to get quality photographs to share with friends and family.
If you have a blog, Shutterfly is offering a deal that you can get 50 free cards.
Sunday, November 14, 2010
Crockpot Chicken and Dumplings
Ingredients:
Large Fryer Chicken (mine was about 4 pounds)
Gallon of Salted Water
3 cups All-Purpose Flour
1 tsp. Baking Powder
2 Large Eggs
Tap Water (about 1/2 cup)
Kitchenware:
Crockpot
Large Mixing Bowl
Rolling Pin
Wooden Spoon
This recipe is easy peasy...
Set your crockpot on High. Pour in your water, and add in your chicken. (If you'd like to add seasoning right now you can.) I added in my seasoning and Bay Leaf. Cook, on High, for 4 hours. Take out your chicken and let cool, so you can debone it.
To make your dumplings:
Combine flour, baking powder, eggs and knead dough, adding water as needed. I eventually added in 1/2 cup of water, but depending on the consistency you desire, you may add less or more. Roll out dough on lightly floured board; cut in strips or squares.
Drop into crockpot. Cook for 20 minutes after the last dumpling has been added. (Cooking time for dumplings may depend based on the size and/or thickness) Add in deboned chicken; stir in GENTLY. Let cook another 10-20 minutes to reheat the chicken. Serve over rice.
This can also be frozen really well in quart containers or ziploc bags.
Friday, October 29, 2010
Baby Carrots
Next up on our baby food list... Carrots. These are also another of Marie's favorites. Well, she seemed to really enjoy squash, but it caused her to break out all over in a rash.
On to the Carrots! I'm going to use a different method to freeze these. In case you don't want to put them in an ice cube tray, you can always use a large cookie sheet with parchment. Obviously, this would take up more freezer space, but if you can spare it, they will freeze faster. (Due to the increase surface exposed)
Carrots are another great and inexpensive food to make. If you don't want to use whole carrots, I'm sure you can use baby carrots. Either way, make sure they are peeled and washed well.
Ingredients:
One Pound of Carrots
Water / Formula / Breastmilk (for thinning purposes... I used about 1 1/2 cups)
Kitchenware:
Vegetable Peeler
Knife
Cutting Board
Saucepan
Steamer Basket
Parchment Paper
Cookie Sheet
Blender / Food Processor / Potato Masher
 Peel and wash your carrots. I used a small bag of whole carrots, which was a pound.
 Cut them into equal-sized chunks. You need to cook these, so the more uniform they are, the faster and more evenly they will cook.
 Prepare your saucepan and steamer basket. Put just enough water visible through the steamer basket.
 Steam until fork tender. It took roughly 25 minutes over Medium heat for me.

 Take out the steamer basket and dispose of the water. I like to use fresh water to puree with, because Nitrates can seep into the water from cooking the carrots.
 Puree the carrots to desired consistency. I added in a 1/4 cup of water at a time, amounting to 1 1/2 cups by the time we got where I wanted.
 I lined a cookie sheet with parchment (Marie was screaming, so it was hastily done) and then added tablespoons of carrot at a time. A pound of carrots and 1 1/2 cups of water made about 29 tablespoons of carrot.


As you can see, I labeled the pan with what I had and the time I stuck it in the freezer. Since I have an Upright Freezer outside with plenty of room, I put the tray there until I could put them in Ziploc Bags.
Thaw desired quantity and use immediately.
On to the Carrots! I'm going to use a different method to freeze these. In case you don't want to put them in an ice cube tray, you can always use a large cookie sheet with parchment. Obviously, this would take up more freezer space, but if you can spare it, they will freeze faster. (Due to the increase surface exposed)
Carrots are another great and inexpensive food to make. If you don't want to use whole carrots, I'm sure you can use baby carrots. Either way, make sure they are peeled and washed well.
Ingredients:
One Pound of Carrots
Water / Formula / Breastmilk (for thinning purposes... I used about 1 1/2 cups)
Kitchenware:
Vegetable Peeler
Knife
Cutting Board
Saucepan
Steamer Basket
Parchment Paper
Cookie Sheet
Blender / Food Processor / Potato Masher


As you can see, I labeled the pan with what I had and the time I stuck it in the freezer. Since I have an Upright Freezer outside with plenty of room, I put the tray there until I could put them in Ziploc Bags.
Thaw desired quantity and use immediately.
Baby Bananas
Do you have a baby? Is that baby almost ready for real foods? Have
you checked the prices of baby food lately? Yikes! Starting out and
trialing foods may be cheaper to do with jarred foods, but since trace
amounts of soy and milk are in some of them, I didn't want to risk a
reaction for Miss Marie. After looking into making my own food for her, I
figured it couldn't be THAT hard, and it is not!
Make sure that you have freezer space for some ice cube trays. If you don't have any trays, you can invest in a few of them. Depending on how much you're making at once, you may need less/more than others. The foods I have made so far have frozen nicely in them, and I pop them into Ziploc bags. Take out a cube or two for baby to defrost, and you have homemade food that will not have preservatives!
Here is one of the first of many baby food recipes! Just because I leave some texture in there, doesn't mean that you have to. Puree/mash to your baby's favorite consistency. I just think that the added little bits of texture makes it more fun for Marie to experience foods for the first time.
Bananas, so far, are one of Marie's favorite foods. I have tried them freshly ripened, and over ripened. She seems to have a preference for the over ripened bananas, so hey, that's cool. Sometimes you can get them a heck of a lot cheaper if they are over ripened. (Kroger is great for finding produce deals!)
Ingredients:
Fresh Bananas
Water / Formula / Breastmilk (optional) - for thinning purposes
Kitchenware:
Large Bowl
Potato Masher / Food Processor / Blender (depending on what you have, and the texture you want)
Ice Cube Trays
 I used five bananas. If you're using over ripened, make sure that you cut out any dark spots.
 Slice them into a bowl and mash away. If you're going to puree them, make sure that you gradually add in small amounts of water. Remember, you can always add water/formula/breastmilk later when you thaw it.
 After said mashing/pureeing.
 Ready to scoop! I used a tablespoon to measure out and put equal amounts into my trays.
 Each tablespoon cube is equal to about half of an ounce. The five average sized bananas made 24 cubes (plus two more in the bowl) Place them in the freezer, until frozen solid. Break out of trays, and store in a labeled Ziploc bag until ready to use. It usually takes our freezer about 4 hours until they are where I want them to be. It's faster to do them in our upright freezer though, since it does get colder.
Make sure that you have freezer space for some ice cube trays. If you don't have any trays, you can invest in a few of them. Depending on how much you're making at once, you may need less/more than others. The foods I have made so far have frozen nicely in them, and I pop them into Ziploc bags. Take out a cube or two for baby to defrost, and you have homemade food that will not have preservatives!
Here is one of the first of many baby food recipes! Just because I leave some texture in there, doesn't mean that you have to. Puree/mash to your baby's favorite consistency. I just think that the added little bits of texture makes it more fun for Marie to experience foods for the first time.
Bananas, so far, are one of Marie's favorite foods. I have tried them freshly ripened, and over ripened. She seems to have a preference for the over ripened bananas, so hey, that's cool. Sometimes you can get them a heck of a lot cheaper if they are over ripened. (Kroger is great for finding produce deals!)
Ingredients:
Fresh Bananas
Water / Formula / Breastmilk (optional) - for thinning purposes
Kitchenware:
Large Bowl
Potato Masher / Food Processor / Blender (depending on what you have, and the texture you want)
Ice Cube Trays


Tuesday, October 12, 2010
Hairbow Holder
I was tired of seeing Marie's bows piled up on the hutch by the door. So, I took matters into my own hands and made this...

I used these to make it with:

Turned it into this:

Then this:
And hung it on the wall


Her hairbands are just strung in on the bottom, but I may add some hooks to hang them from.
Creamed Potatoes
These are lovely. Creamy, silky, and amazingly easy to make.
Ingredients:
Potatoes (I used Russets, but Yukons would be perfect here too!)
13 oz can of Evaporated milk (I was running low on milk, so I used this instead. Either would work.)
Butter to taste
Salt
Pepper
Kitchenware:
Large Pot
Strainer
Vegetable Peeler
 Wash your potatoes well by scrubbing them under running water. Then peel (if you wish) potatoes and cut into uniform chunks.
 In a pot of boiling water, let the potatoes come back to a boil, and then cook 7-10 minutes, or until tender. You can test this by taking a few pieces out and using a fork to test for doneness.


Ingredients:
Potatoes (I used Russets, but Yukons would be perfect here too!)
13 oz can of Evaporated milk (I was running low on milk, so I used this instead. Either would work.)
Butter to taste
Salt
Pepper
Kitchenware:
Large Pot
Strainer
Vegetable Peeler


Drain potatoes and return to pot. If you wish to mash them, do so at this time. I left them as they were, and added my milk, butter, and seasonings at this point.

Stir them up a bit and you have creamed potatoes! (or mashed if you chose to do so)
These make an excellent companion to Hamburger Steaks, Fried Chicken and many other dishes!

Hamburger Steaks
Yesterday was spent cleaning and organizing the office, catching up on laundry, and trying to appease Miss Marie. Again, time ran away from me, and the next thing I knew, it was 3:30 and I had no idea what dinner was going to be. I could live off of grilled chicken the rest of my life, but Jason doesn't have the same sentiment. I still had a whole family pack of ground sirloin in the fridge that I had not divided up in the freezer yet, so my brain went crazy. No burgers, (I have to have buns for some reason), didn't want spaghetti (although, I could live off of it too!), and didn't really want meatloaf either.
But, I did have a bunch of fresh mushrooms and potatoes that needed to be loved on, so Hamburger Steaks it was! You can also make extra steaks and freeze them for later if you have the time. After you've shaped them, line a cookie sheet with parchment, stick them in the freezer until they harden, and then throw them in a labeled freezer bag.

Ingredients:
1/2 tsp cayenne, Italian seasoning, paprika
1/4 tsp salt, pepper
1/4 c Worcestershire sauce, soy sauce
Hot Sauce to taste
1 egg
1 Packet of Onion Soup Mix
Bread Crumbs, as needed (I used about a 1/2 cup)
1 onion
8 ounces of mushrooms (canned or fresh)
Olive oil
Kitchenware:
Large Skillet
Cutting Board
Knife
Mixing Bowl
Spatula
 Start by mixing your spices together in the mixing bowl. Add in worcestershire, soy sauce, hot sauce, egg and onion soup mix.


Next, mix in your egg and enough breadcrumbs that it is still moist, but not runny.
Then, add in your ground meat (either hamburger or venison) and mix well. Put in the refrigerator and let chill for 5 to 10 minutes.


Meanwhile,pre-heat your skillet on Medium-High heat, and add your oil. Thinly slice your onions into half moons, and slice your mushrooms. Add them to the skillet, and let them cook until tender (5 to 10 minutes). Add garlic here also if you'd like.

Form your steaks. Make them any size you would like, but make sure that they are equal in thickness.


Turn down heat to Medium. Scoot away the veggies to make room for the hamburger steaks. Let them brown on both sides (about 2-3 minutes per side). Add water to let them cook. Remember, you can always add water, but you can't take it away. So, depending on how much gravy you'd like, and the consistency of it, will depend on how much water you'll need.

I added too much water, so I cheated and used Tony Chachere's Instant Roux Mix. It is a LIFESAVER to help thicken gravies when I've made them a bit too thin. (and it adds a bit of color)
Let it come to a boil, then drop it to Medium-Low heat, simmer for 30 minutes to an hour to develop flavors.
Serve over rice or Creamed Potatoes and enjoy!
But, I did have a bunch of fresh mushrooms and potatoes that needed to be loved on, so Hamburger Steaks it was! You can also make extra steaks and freeze them for later if you have the time. After you've shaped them, line a cookie sheet with parchment, stick them in the freezer until they harden, and then throw them in a labeled freezer bag.

Ingredients:
1/2 tsp cayenne, Italian seasoning, paprika
1/4 tsp salt, pepper
1/4 c Worcestershire sauce, soy sauce
Hot Sauce to taste
1 egg
1 Packet of Onion Soup Mix
Bread Crumbs, as needed (I used about a 1/2 cup)
1 onion
8 ounces of mushrooms (canned or fresh)
Olive oil
Kitchenware:
Large Skillet
Cutting Board
Knife
Mixing Bowl
Spatula


Then, add in your ground meat (either hamburger or venison) and mix well. Put in the refrigerator and let chill for 5 to 10 minutes.


Meanwhile,pre-heat your skillet on Medium-High heat, and add your oil. Thinly slice your onions into half moons, and slice your mushrooms. Add them to the skillet, and let them cook until tender (5 to 10 minutes). Add garlic here also if you'd like.

Form your steaks. Make them any size you would like, but make sure that they are equal in thickness.


Turn down heat to Medium. Scoot away the veggies to make room for the hamburger steaks. Let them brown on both sides (about 2-3 minutes per side). Add water to let them cook. Remember, you can always add water, but you can't take it away. So, depending on how much gravy you'd like, and the consistency of it, will depend on how much water you'll need.

I added too much water, so I cheated and used Tony Chachere's Instant Roux Mix. It is a LIFESAVER to help thicken gravies when I've made them a bit too thin. (and it adds a bit of color)
Let it come to a boil, then drop it to Medium-Low heat, simmer for 30 minutes to an hour to develop flavors.
Serve over rice or Creamed Potatoes and enjoy!
Tomato Sauce
Light Tomato Sauce
7 servings – ½ cup per serving
Adapted from Cooking Light.

.Ingredients:
1 Tbsp olive oil
1 cup finely chopped onion
4 garlic cloves, minced
2 28-oz. cans whole peeled Italian tomatoes, undrained
2/3 cup thinly sliced fresh basil
3/4 tsp salt, divided
1/8 tsp black pepper, divided


In a medium pot or small Dutch oven, heat olive oil over medium heat. Add onion and cook 8 minutes, stirring occasionally, until almost tender. Add garlic and cook an additional 2 minutes, until garlic is fragrant and onion is tender.
 Crush the canned tomatoes over the pot by hand, making sure you
remove any chunks of stem. Pour in juice leftover in can. Bring
everything to a boil.
Crush the canned tomatoes over the pot by hand, making sure you
remove any chunks of stem. Pour in juice leftover in can. Bring
everything to a boil.
Drop heat to low and simmer for about 80 or 90 minutes, until sauce is thick and/or the consistency you like.


Kill the heat and stir in the basil, salt, and pepper. I also added in some fresh thyme here since I hand some on hand. Eat immediately with pasta, or refrigerate overnight to let flavors meld. You can freeze the leftovers, too
Marie was awake and SUPER fussy when I was trying to crush the whole tomatoes by hand. Granted, I did love the rustic textures created by crushing the tomatoes, you could use crushed tomatoes instead to make it easier.
7 servings – ½ cup per serving
Adapted from Cooking Light.

1 Tbsp olive oil
1 cup finely chopped onion
4 garlic cloves, minced
2 28-oz. cans whole peeled Italian tomatoes, undrained
2/3 cup thinly sliced fresh basil
3/4 tsp salt, divided
1/8 tsp black pepper, divided


In a medium pot or small Dutch oven, heat olive oil over medium heat. Add onion and cook 8 minutes, stirring occasionally, until almost tender. Add garlic and cook an additional 2 minutes, until garlic is fragrant and onion is tender.

Drop heat to low and simmer for about 80 or 90 minutes, until sauce is thick and/or the consistency you like.


Kill the heat and stir in the basil, salt, and pepper. I also added in some fresh thyme here since I hand some on hand. Eat immediately with pasta, or refrigerate overnight to let flavors meld. You can freeze the leftovers, too
Marie was awake and SUPER fussy when I was trying to crush the whole tomatoes by hand. Granted, I did love the rustic textures created by crushing the tomatoes, you could use crushed tomatoes instead to make it easier.
Wednesday, October 6, 2010
How to Make the Perfect Waffle
I realized after I put up the waffle recipe that some of you may not know how easy it really is to make them yourself. I've had a waffle iron for years, and just recently figured out how to make waffles without destroying them (or myself!).
Before you plug in your waffle iron, use some non-stick spray or wipe it with a paper towel lightly coated with oil. Make sure that it's just a light coating, because too much could alter the taste of your waffle.
Make sure that the waffle iron is HOT. My iron's light goes off whenever it's heated all the way. This is when you want to add the batter.
How much batter to add?
That all depends on your waffle iron. Start with 1/4 c of batter and work your way up until you find the magic number.
Some waffle irons have signals to tell you when your waffle is done. If I would listen to mine, like I have in the past, I would have nothing but burnt or almost burnt waffles.
A waffle is done when there is little to no steam escaping from the sides of your waffle iron, and the waffle is lightly browned.
If you have leftovers, let them cool, throw them in a freezer bag, and save them for another morning when you don't feel like cooking!
Pumpkin Walnut Waffles
Since fall is here officially, and the switch from 100 degrees to 70 is making us all anemic, I thought about making waffles... with pumpkin... and they were amazing! Had my brain been thawed out when I made these this morning, there would be some pictures to accompany it, but it's not the case. If you need pointers to help you make waffles, look here. I promise, I was once there too, perpetually burning waffles. I think that's why I loved pancakes so much!
If you don't have self-rising flour, but you have all-purpose, baking powder and salt, you can sub .
1 cup of all-purpose, 1 1/2 tsp baking powder and 1/4 tsp salt = 1 cup of self rising flour
Same goes for the pumpkin pie spice.
1/2 tsp cinnamon, 1/4 tsp ginger, 1/8 tsp nutmeg and 1/8 tsp cloves = 1 tsp pumpkin pie spice
Ingredients:
2 c self-rising flour
2 tsp pumpkin pie spice
Kitchenware:
Large Mixing Bowl
2 Small Mixing Bowls
Whisk or Stirring Utensil
Waffle Iron
Fork or other Utensil of choice to get Waffles out
Heat up your waffle iron. In the large bowl, combine flour and pumpkin pie spice.
In a small bowl, beat egg yolks until thick and lemon colored. Then, stir in milk, oil and pumpkin. Add this to flour mixture, and stir until Incorporated.
In another small bowl, beat your egg whites until they are stiff. Carefully, fold them into the flour mixture. Be sure not to overmix this, as overmixing will cause the whites to deflate;therefore losing the extra fluffiness. Fold in nuts at this time.
Bake in waffle iron according to manufacturer's instructions
Serve with warmed syrup and a big glass of milk.
You can double the batch and freeze the leftovers. These are a lot tastier than an Eggo any day!
If you don't have self-rising flour, but you have all-purpose, baking powder and salt, you can sub .
1 cup of all-purpose, 1 1/2 tsp baking powder and 1/4 tsp salt = 1 cup of self rising flour
Same goes for the pumpkin pie spice.
1/2 tsp cinnamon, 1/4 tsp ginger, 1/8 tsp nutmeg and 1/8 tsp cloves = 1 tsp pumpkin pie spice
Ingredients:
2 c self-rising flour
2 tsp pumpkin pie spice
| 3 large eggs, separated | ||||||||||
| 1 3/4 c milk | ||||||||||
| 1/2 c vegetable oil | ||||||||||
| 1/2 c canned pumpkin (pumpkin pie mix will NOT work here) | ||||||||||
| 1/2 c chopped walnuts (for extra flavor, you can toast these first!) | ||||||||||
| Your Favorite Syrup |
Kitchenware:
Large Mixing Bowl
2 Small Mixing Bowls
Whisk or Stirring Utensil
Waffle Iron
Fork or other Utensil of choice to get Waffles out
Heat up your waffle iron. In the large bowl, combine flour and pumpkin pie spice.
In a small bowl, beat egg yolks until thick and lemon colored. Then, stir in milk, oil and pumpkin. Add this to flour mixture, and stir until Incorporated.
In another small bowl, beat your egg whites until they are stiff. Carefully, fold them into the flour mixture. Be sure not to overmix this, as overmixing will cause the whites to deflate;therefore losing the extra fluffiness. Fold in nuts at this time.
Bake in waffle iron according to manufacturer's instructions
Serve with warmed syrup and a big glass of milk.
You can double the batch and freeze the leftovers. These are a lot tastier than an Eggo any day!
Barbecue Sauce
This recipe will go along well with the upcoming BBQ Chicken Braid, so be sure to make it! This is undoubtedly some of the best BBQ sauce I've had, and I don't even really like barbecue sauce!
It is really easy to make once you get everything in the pot, and thaws wonderfully from the freezer. You can always double it if you wish, but it is so easy to make, that it really isn't much trouble if you have all of the ingredients. The only tricky ingredient for me to find was the celery seed.
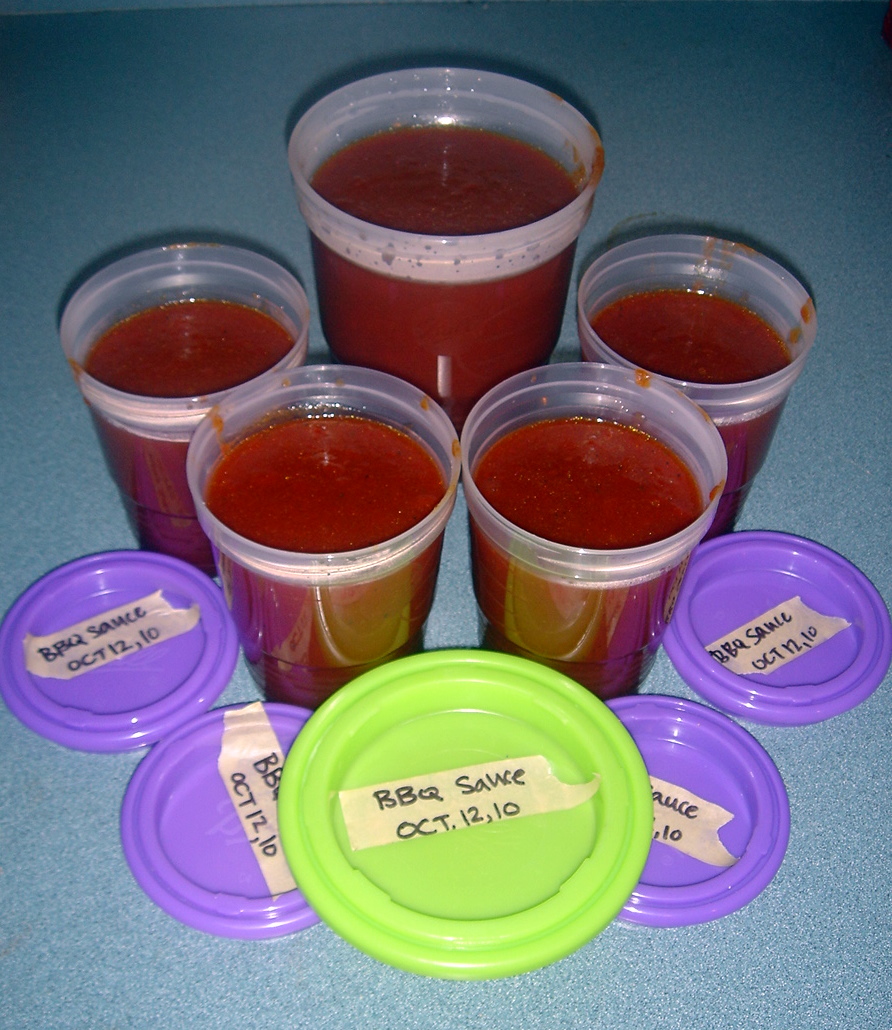
As for a freezing container? If you check out the canning section, Ball has these wonderful plastic jars that are meant for freezing. The larger ones have lime green lids, and smaller, purple. I filled two green jars and a purple jar I also kept two cups of it for a recipe later that evening, so it may take three green and two purple. Either way, they are really handy to have!

This will make about 7 cups of barbecue sauce, and will last for about two months if you use it occasionally.


Ingredients:
2 cups ketchup (I use Simply Heinz, so there's no added High Fructose Corn Syrup)
2 cups tomato sauce (2 of the 8 oz cans)
1 1/4 cups brown sugar
1 1/4 cups red wine vinegar (or regular white vinegar if you're out)
1/2 cups unsulphured molasses
2 T butter, cut into small pieces
4 tsp hickory flavored liquid smoke (found by the barbecue and steak sauces)
1/2 tsp onion powder
1/2 tsp garlic powder
1/4 tsp chili powder
1 tsp paprika
1/2 tsp celery seed
1/4 tsp ground cinnamon
1/2 tsp cayenne pepper
1 tsp salt
1 tsp coarsely ground pepper
Honey to taste, optional (I added in about a 1/4 cup)
Kitchenware:
Measuring Vessels
Saucepan
Wooden Spoon
Freezing Vessels
In a large saucepan, over medium heat, mix together all the wet ingredients and then add the seasonings. Bring to a boil then reduce the heat to low and simmer for at least 20 minutes, stirring occasionally. The sauce will thicken as it simmers (and then as it cools). If you have a crock pot handy, I'm sure you could just throw it in there instead. (I'll have to test that out next time!)


Try to plan ahead and simmer for at least an hour.After it cools completely, put in freezing vessels and freeze desired quantity. Make sure you keep some in the refrigerator, because this sauce is great!


It is really easy to make once you get everything in the pot, and thaws wonderfully from the freezer. You can always double it if you wish, but it is so easy to make, that it really isn't much trouble if you have all of the ingredients. The only tricky ingredient for me to find was the celery seed.
As for a freezing container? If you check out the canning section, Ball has these wonderful plastic jars that are meant for freezing. The larger ones have lime green lids, and smaller, purple. I filled two green jars and a purple jar I also kept two cups of it for a recipe later that evening, so it may take three green and two purple. Either way, they are really handy to have!

This will make about 7 cups of barbecue sauce, and will last for about two months if you use it occasionally.


Ingredients:
2 cups ketchup (I use Simply Heinz, so there's no added High Fructose Corn Syrup)
2 cups tomato sauce (2 of the 8 oz cans)
1 1/4 cups brown sugar
1 1/4 cups red wine vinegar (or regular white vinegar if you're out)
1/2 cups unsulphured molasses
2 T butter, cut into small pieces
4 tsp hickory flavored liquid smoke (found by the barbecue and steak sauces)
1/2 tsp onion powder
1/2 tsp garlic powder
1/4 tsp chili powder
1 tsp paprika
1/2 tsp celery seed
1/4 tsp ground cinnamon
1/2 tsp cayenne pepper
1 tsp salt
1 tsp coarsely ground pepper
Honey to taste, optional (I added in about a 1/4 cup)
Kitchenware:
Measuring Vessels
Saucepan
Wooden Spoon
Freezing Vessels
In a large saucepan, over medium heat, mix together all the wet ingredients and then add the seasonings. Bring to a boil then reduce the heat to low and simmer for at least 20 minutes, stirring occasionally. The sauce will thicken as it simmers (and then as it cools). If you have a crock pot handy, I'm sure you could just throw it in there instead. (I'll have to test that out next time!)


Try to plan ahead and simmer for at least an hour.After it cools completely, put in freezing vessels and freeze desired quantity. Make sure you keep some in the refrigerator, because this sauce is great!
The Finished Product.

I still had a Green Jar of Sauce in the fridge, so I luckily had enough purple ones. These work wonderfully in the fridge as well as the freezer!
Subscribe to:
Posts (Atom)